We all know Chrome uses a lot of RAM which leads tabs to freeze unexpectedly and downloads take a very long time. But millions of Chrome users are impacted by these issues every day, but the majority are unaware that the browser has robust optimization features integrated right into its core.
Learning how to use Google Chrome like a pro means accessing both features like Performance Hub and the experimental ‘flags’ settings. In Chrome 143, Google has moved many of its best optimization tools out of testing and into the main settings menu meaning they aren’t hidden anymore. Some of these hidden tools are found in the “flags” experimental settings which is available from the Chrome URL chrome://flags, while others are found throughout the Chrome browser as shortcuts, settings etc. All of the test settings contained in this guide have been validated for the current Chrome 143 stable release.
For some settings you’ll need to restart the browser after making and a few might potentially cause problems with specific websites. But rest assured any changes you make can be instantly reversed.
Understanding Chrome’s Hidden Settings System
Chrome keeps multiple experimental features over on chrome://flags because they’re still being worked on and not just by Google. In fact they’re still very much a work in progress so you may find a setting that gives one person a nice performance boost but wipes out another person’s system. This way of doing things lets Google test out all this new functionality on a massive scale before deciding what gets stuck in for good.
The term “hidden” does not mean these features are dangerous to use. Google is happy to document everything over at the Chromium project: that’s how they do all their development work. However stability cannot be guaranteed. Some flags may work reliably for you without any issues at all. Others come and go again the very next time you update Chrome.
How to Use Google Chrome Like a Pro: 10 Hidden Settings
Chrome eats up memory like crazy, downloads crawl when they should fly, and scrolling feels janky on sites that should run smooth. Most people just accept this as normal Chrome behavior, but there’s actually a bunch of settings buried in chrome://flags that can fix a lot of these problems.
I’ve been messing with these flags for a while now, and honestly some of them make a real difference while others are kind of overhyped. The ones I’m covering here actually work on Chrome 143 (current version as of late December 2025), so you won’t waste time hunting for flags that Google already removed.
Before jumping in: these are experimental settings, which means Google’s still testing them and they might cause weird behavior on some sites. The good news is you can reset everything instantly if something breaks. Just go to chrome://flags and hit the “Reset all” button at the top.
1. AI Tab Organizer
If you’re one of those people who has 20+ tabs or more open at the same time, the real problem is always figuring out where that one specific page you need is hidden. The good news is that Chrome 143 has a nifty built-in tool that uses AI to help sort your tabs out by automatically grouping them together into neat labeled groups.
You can turn it on by clicking the Tab Search dropdown (that small arrow icon up in the top corner) and selecting Organise tabs or Organize tabs on some systems. Then let Chrome do its thing and it will start grouping your tabs for you like “Work,” “Research” or “Taxes”, and it even comes up with a name and an emoji for the group. It makes it a whole lot easier to close down the whole lot if you’re not using them which is a big help when it comes to keeping your browser running smoothly.
It’s a great feature to keep on from day one. With just two clicks you can turn a messy browser bar into a tidy workspace where you can actually see what you’re doing.
2. Reading Mode
Modern websites are a mess of navigation bars, ads, newsletter popups, and social media widgets that make reading harder than it should be. Chrome’s Reading Mode strips all that garbage out and gives you just the text and images in a clean, distraction-free side panel.
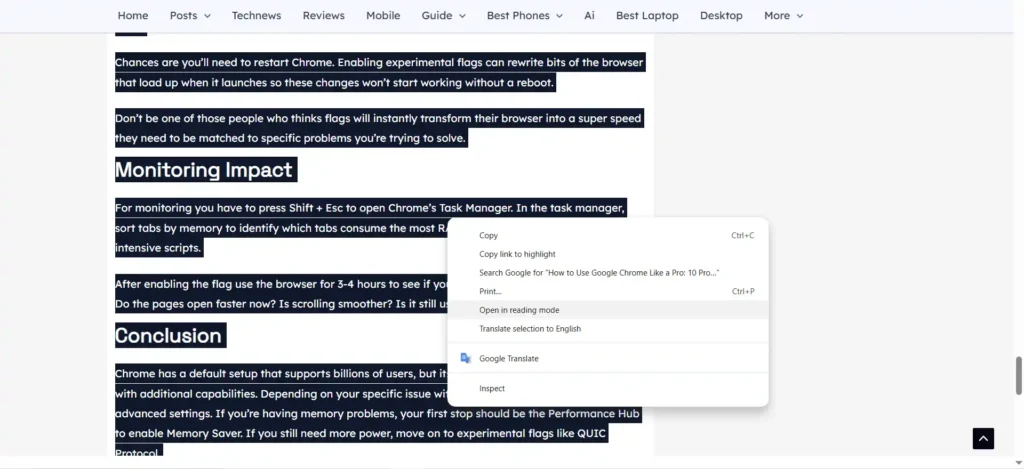
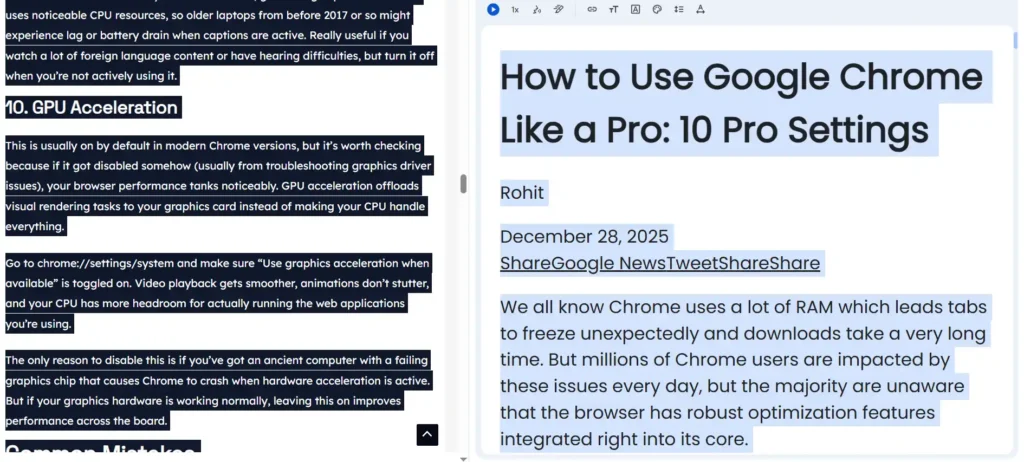
In Chrome 143 Reading Mode is now a core feature. To use it, Firstly select all the text and then simply right-click on any article and select “Open in reading mode.” This opens a sidebar where you can still adjust font size, typeface, and background color (including Dark and Sepia themes) to your preference.
The biggest “pro” update in this version is the AI-powered Read Aloud function. Once the reading panel is open, click the Play button at the top to have Chrome narrate the article using natural-sounding neural voices. You can also click the Pin icon in the side panel header to add a permanent Reading Mode shortcut to your toolbar for one-click access.
The main limitation remains that it works best on long-form, article-focused sites (about 70–80% of the web). Interactive elements like comment sections are removed to maintain focus, but since it opens in a side panel, you can now keep the original webpage open on the left while you read or listen on the right.
3. Proactive Tab Discarding & Performance Alerts
Chrome creates a separate process in memory for every single tab you open, which is why the browser turns into a memory hog with 30+ tabs. Previously, you had to force this with a “Tab Freezing” flag, but in the current 143 release, Chrome handles this via Proactive Discarding and Performance Issue Alerts.
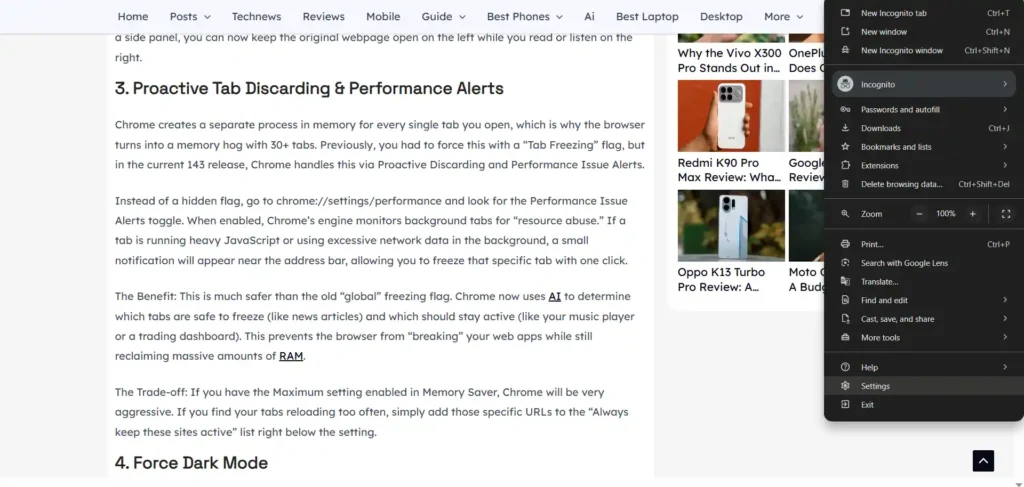
Instead of a hidden flag, go to chrome://settings/performance and look for the Performance Issue Alerts toggle. When enabled, Chrome’s engine monitors background tabs for “resource abuse.” If a tab is running heavy JavaScript or using excessive network data in the background, a small notification will appear near the address bar, allowing you to freeze that specific tab with one click.
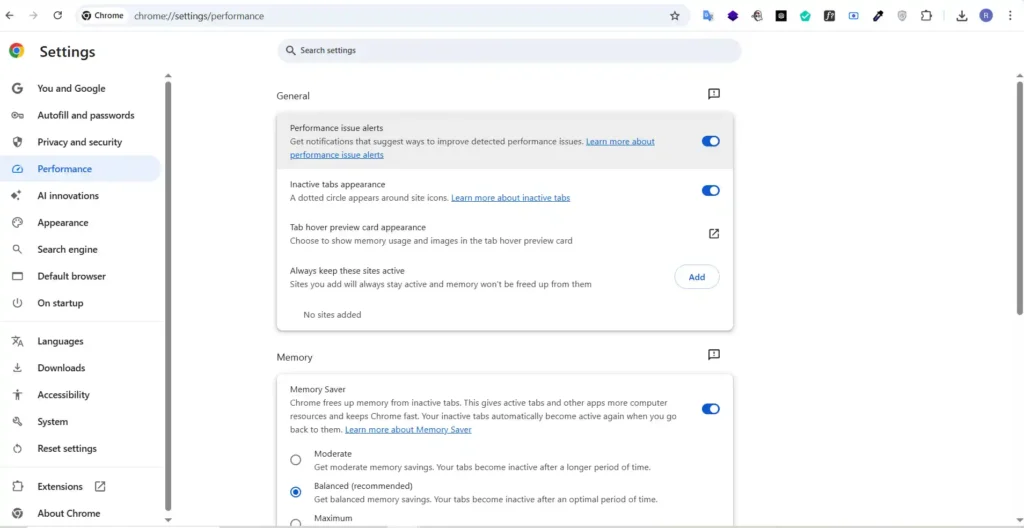
The Benefit: This is much safer than the old “global” freezing flag. Chrome now uses AI to determine which tabs are safe to freeze (like news articles) and which should stay active (like your music player or a trading dashboard). This prevents the browser from “breaking” your web apps while still reclaiming massive amounts of RAM.
The Trade-off: If you have the Maximum setting enabled in Memory Saver, Chrome will be very aggressive. If you find your tabs reloading too often, simply add those specific URLs to the “Always keep these sites active” list right below the setting.
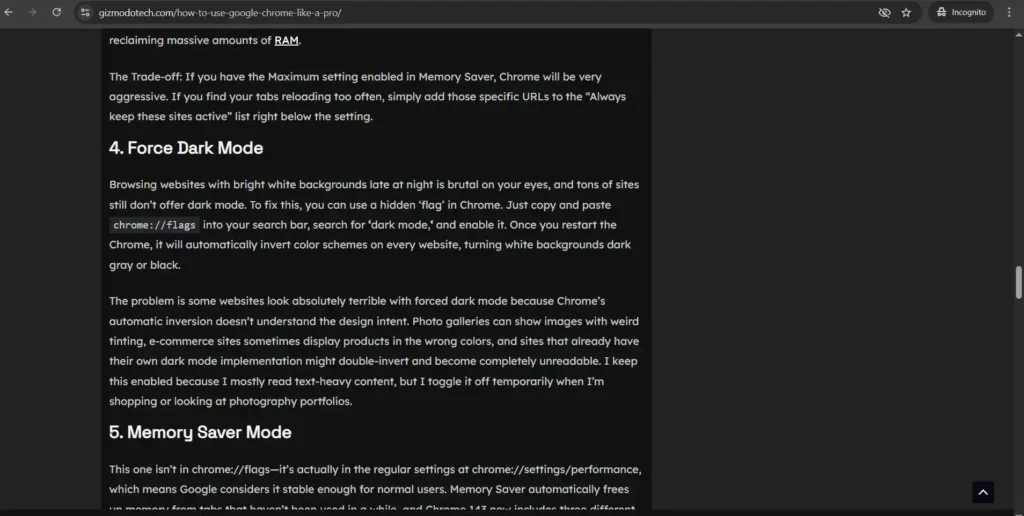
4. Force Dark Mode
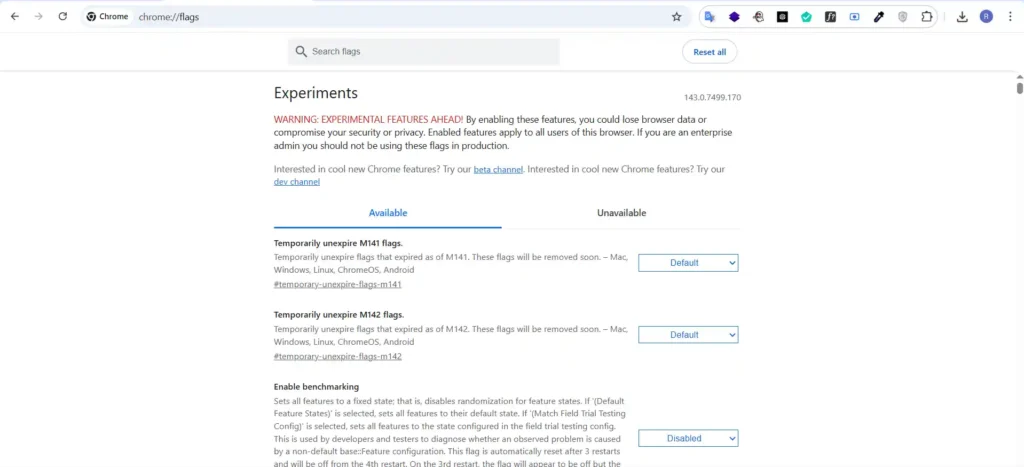
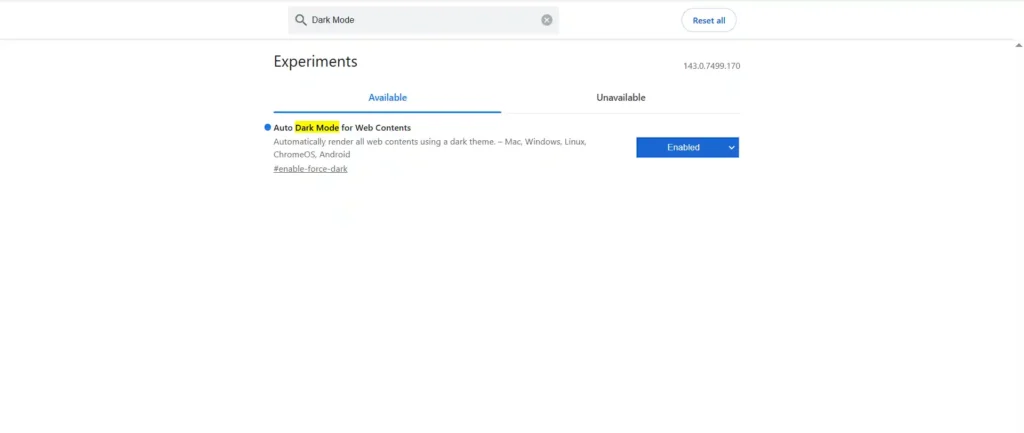
Browsing websites with bright white backgrounds late at night is brutal on your eyes, and tons of sites still don’t offer dark mode. To fix this, you can use a hidden ‘flag’ in Chrome. Just copy and paste chrome://flags into your search bar, search for ‘dark mode,‘ and enable it. Once you restart the Chrome, it will automatically invert color schemes on every website, turning white backgrounds dark gray or black.
The problem is some websites look absolutely terrible with forced dark mode because Chrome’s automatic inversion doesn’t understand the design intent. Photo galleries can show images with weird tinting, e-commerce sites sometimes display products in the wrong colors, and sites that already have their own dark mode implementation might double-invert and become completely unreadable. I keep this enabled because I mostly read text-heavy content, but I toggle it off temporarily when I’m shopping or looking at photography portfolios.
5. Memory Saver Mode
This one is actually in the regular settings at chrome://settings/performance, which means Google considers it stable enough for normal users. Memory Saver automatically frees up memory from tabs that haven’t been used in a while, and Chrome 143 now includes three different modes you can choose from instead of just one setting.
Go to that URL and toggle “Memory Saver” on, then pick which mode you want. Moderate gives you some memory savings but keeps tabs active longer. Balanced is the recommended middle ground. Maximum aggressively frees up memory by deactivating tabs faster. Inactive tabs reload when you click them (takes about 1-2 seconds), but your memory usage drops pretty noticeably when you’ve got lots of tabs open.
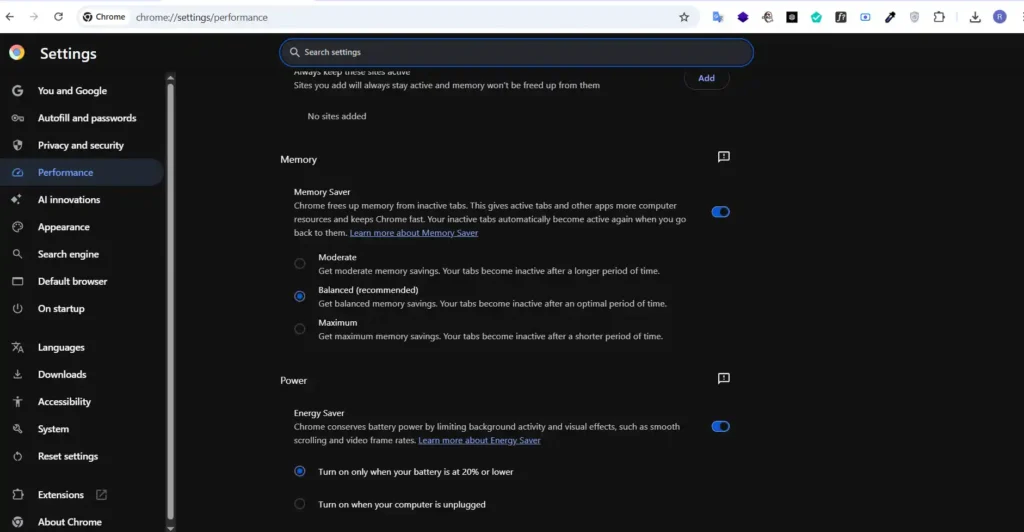
You can add frequently used sites to an exception list so they don’t get memory-wiped even when inactive. The annoying part is tabs you return to frequently will reload unnecessarily, and some background processes stop working (similar issue to the tab freezing flag). I’ve found it works best if you’re disciplined about adding exceptions for sites you actually use regularly.
6. QUIC Protocol
QUIC is Google’s replacement for TCP that’s supposed to speed up connection establishment and handle packet loss better. Traditional TCP requires multiple round-trips to set up secure connections, adding somewhere between 50-100ms of latency every time you connect to a site.
Navigate to chrome://flags, then serach for QUIC Protocol and then set it to “Enabled,” and restart. The protocol activates automatically when connecting to servers that support it (which includes all Google services like YouTube and Gmail, plus an increasing number of other sites). Connection establishment drops from roughly 100ms to about 10ms on repeat visits.
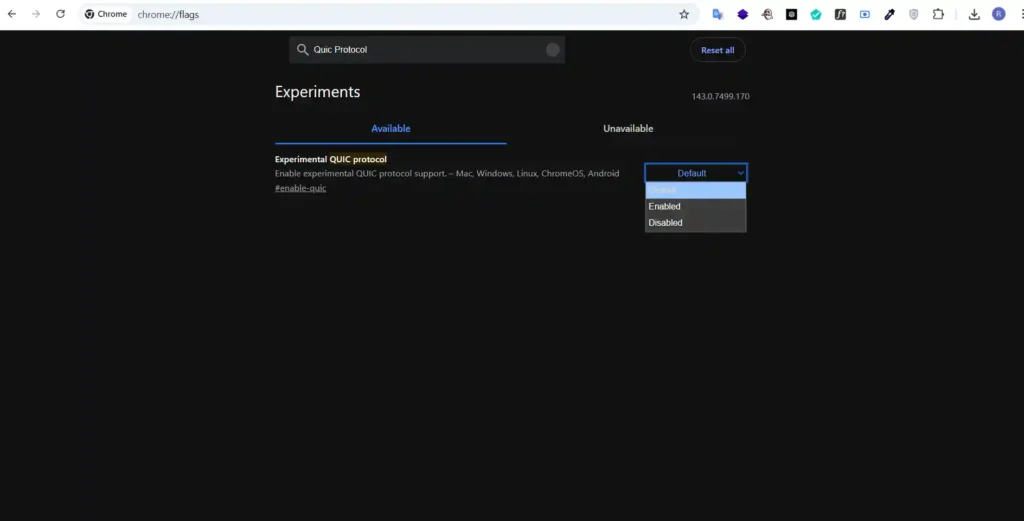
The problem is QUIC runs over UDP instead of TCP, and some corporate firewalls just block UDP traffic entirely, which will break the connection completely. Certain ISPs also throttle or deprioritize UDP packets because they associate it with torrenting or gaming traffic. I’d say enable it by default and only disable it if you start seeing connection timeout errors on sites you know should work.
7. Enhanced Safe Browsing
Standard Safe Browsing in Chrome checks sites against a list that updates every 30 minutes, which sounds frequent until you realize sophisticated phishing operations can spin up new URLs and burn them within that window. Enhanced Safe Browsing (chrome://settings/security) switches to real-time checking instead.
Go there and select “Enhanced protection.” Chrome will now send URLs to Google in real-time for verification, and protection updates instantly when new threats are identified.
Obviously this sends your browsing data to Google for analysis, which is a privacy tradeoff you need to decide on yourself. If you’re someone who clicks on sketchy links regularly or downloads files from questionable sources, the extra security is probably worth it. For most people who practice basic internet hygiene, standard Safe Browsing catches enough threats that Enhanced mode is overkill.
8. Heavy Ad Intervention
Heavy Ad Intervention Some websites just seem to load a ton of ads that gobble up all our CPU, data or battery life – usually those annoying autoplaying videos or super complicated scripts that run away in the background. What’s changed in Chrome 143 is that what used to be an experimental flag is now a built-in feature in the privacy tools just to keep our browsing pages snappy and running smoothly.
To get this to start working for you, head into Settings > Privacy and Security > Site Settings. Scroll down in there to Additional Content Settings and click on Ads and make sure that toggle is switched on to block ads on the sites that insist on shoving intrusive or downright misleading ads in our faces. From now on, Chrome will quietly keep an eye out for ad frames that are using up a lot of resources and unload them the second they go over the line. If an ad gets blocked for being too “heavy” you’ll just see a grey placeholder where the ad used to be.
The catch is – on occasion, Chrome might get a bit confused and block something that is genuinely just an interactive little widget or some embedded media that’s on a news site. It can also occasionally bug out on paywalls. And because the thresholds are all set by Google, you can’t manually fiddle with how strict it is – but it’s still a great little trick to speed up your browsing and save battery life if you don’t already have a third party ad blocker installed.
9. Live Caption Multi-Language
Chrome’s live caption feature generates real-time captions for any audio or video playing in the browser, but the default version only supports English. The multi-language flag (chrome://flags/#enable-live-caption-multilang) extends this to Spanish, French, German, Italian, Japanese, and several other languages.
Go to that URL, enable the flag, and restart. Then head to chrome://settings/accessibility and turn on Live Caption, where you can now select your preferred language. Captions appear in a movable overlay window at the bottom of whatever’s playing.
The catch is accuracy varies significantly by language. English captions are maybe 85-90% accurate under good conditions, but other languages drop to somewhere around 70-80%. Background noise or multiple speakers talking over each other will tank accuracy even further. Also, generating captions on-device uses noticeable CPU resources, so older laptops from before 2017 or so might experience lag or battery drain when captions are active. Really useful if you watch a lot of foreign language content or have hearing difficulties, but turn it off when you’re not actively using it.
10. GPU Acceleration
This is usually on by default in modern Chrome versions, but it’s worth checking because if it got disabled somehow (usually from troubleshooting graphics driver issues), your browser performance tanks noticeably. GPU acceleration offloads visual rendering tasks to your graphics card instead of making your CPU handle everything.
Go to chrome://settings/system and make sure “Use graphics acceleration when available” is toggled on. Video playback gets smoother, animations don’t stutter, and your CPU has more headroom for actually running the web applications you’re using.
The only reason to disable this is if you’ve got an ancient computer with a failing graphics chip that causes Chrome to crash when hardware acceleration is active. But if your graphics hardware is working normally, leaving this on improves performance across the board.
Common Mistakes
Enabling ten flags at once will leave you going round in circles trying to figure out what’s gone wrong. According to the issues you are facing, only enable 2-3 maximum per session for hours, then add more.
Chances are you’ll need to restart Chrome. Enabling experimental flags can rewrite bits of the browser that load up when it launches so these changes won’t start working without a reboot.
Don’t be one of those people who thinks flags will instantly transform their browser into a super speed they need to be matched to specific problems you’re trying to solve.
Monitoring Impact
For monitoring you have to press Shift + Esc to open Chrome’s Task Manager. In the task manager, sort tabs by memory to identify which tabs consume the most RAM. Sort by CPU to find processor intensive scripts.
After enabling the flag use the browser for 3-4 hours to see if your changes have made any difference. Do the pages open faster now? Is scrolling smoother? Is it still using up too much memory?
Conclusion
Chrome has a default setup that supports billions of users, but its advanced settings provide users with additional capabilities. Depending on your specific issue with Chrome you can try 2 to 3 different advanced settings. If you’re having memory problems, your first stop should be the Performance Hub to enable Memory Saver. If you still need more power, move on to experimental flags like QUIC Protocol.
Please note that you can enable or disable any of the flags in seconds. Knowing how to set up and use Google Chrome as if you were an expert requires that you set each flag based on your individual situation; you should not enable all of the flags at once, but rather enable the flags that will best help you solve your specific problems.
No comments yet. Be the first to share your thoughts!